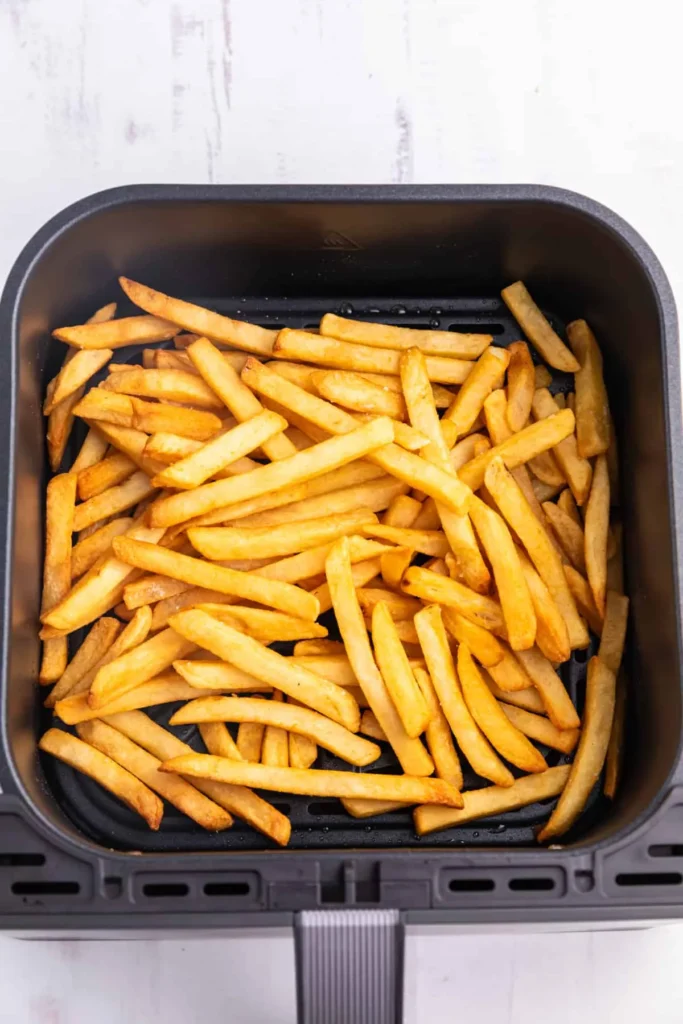
You slide the basket out and those fries look shatteringly crisp. Golden edges, tiny blistered spots, a dry matte surface that promises crunch. What your eyes tell you is “fried.” But there’s no pool of bubbling oil down there, just a perforated tray and maybe a teaspoon of fat you tossed the potatoes in.
That’s the first clue that how an air fryer cooks food has almost nothing to do with conventional frying. You’re looking at the end result of a tightly controlled windstorm, not a hot-oil bath.
Inside that compact chamber, air is moving at highway speeds across a 1200W to 1800W heating coil, hitting food from every angle a perforated basket will allow. Manufacturers specify that the element can bring the cavity to 400°F in under three minutes, which is why most people never bother preheating. We’ll walk through exactly what’s happening in there, step by step, starting with the gap between what the crispy exterior suggests and the physics actually at work.

Quick Answer
An air fryer cooks food by blasting hot air at high speed across food in a small perforated basket. A top-mounted heating coil warms the air. A powerful fan forces it downward and around.
The cyclone strips moisture, browns proteins, and crisps starches. A thin coat of oil helps conduct heat into surface nooks. No immersion frying happens.
What Your Eyes See vs. What’s Actually Happening in an Air Fryer
You glance through the window and see food darkening, edges tightening, maybe a wisp of steam curling out the vent. Your brain files that under “frying” because the visual cues are identical to shallow-frying or broiling. But physically, the process has more in common with a high-speed dehydration chamber that happens to also deliver intense radiant heat.
Aggregate user reports consistently mention surprise at how little oil is needed for a deep-fried look. That’s because the browning you’re seeing isn’t oil-mediated browning the way a deep fryer does it. In a deep fryer, hot oil surrounds the food, filling every crevice and conducting heat uniformly.
In an air fryer, you’re relying on two mechanisms working at once: rapid moisture removal from the surface and direct heat transfer from violently moving air. The oil’s job shrinks to a thin facilitator, just enough to fill microscopic surface gaps so the Maillard reaction can fire evenly.
What looks like frying is actually convection plus radiation. The heating element glows inches above the food, pouring radiant heat straight down. At the same time, the fan blasts that hot air around the sides and bottom via the basket’s holes.
Your eyes see what could pass for oil-fried results, but the texture differences are real. Air-fried surfaces tend to be slightly drier and lighter than the dense, oil-logged crust of deep frying. Once you learn to read those visual cues, you can tweak time and oil amount to get closer to whichever texture you prefer.
The Two Things Doing All the Work: Heating Element and High-Velocity Fan
Two components define how an air fryer cooks food, and both sit in the roof of the cooking cavity. The heating element is a coiled metal tube, much like the broil element in a conventional oven but positioned much closer to the food. The fan sits directly above it, pulling air through the coil and forcing it downward at speeds that, per manufacturer specs, can exceed 30 mph inside that confined space.
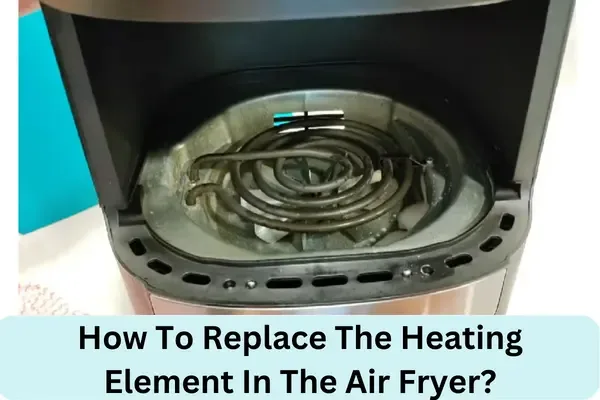
That close placement changes everything. In a full-size convection oven, the heating element and fan live behind a rear wall, and the oven cavity is large enough that air cools by the time it hits the food. Here, the gap between the glowing coil and the top of the food can be under two inches.
So you’re getting a double punch: scorching radiant heat from above and a high-velocity cyclone that strips boundary-layer moisture from the food surface almost instantly.
It’s worth noting that most air fryers don’t let you adjust fan speed independently. It’s a fixed, high-RPM blower paired with an adjustable thermostat. When you set the temperature dial to 375°F, you’re telling the heating element when to cycle on and off, but the fan runs continuously.
Our research into teardown videos and repair guides shows that this constant airflow is why even thick chicken thighs can develop a browned crust while staying juicy inside. The moving air keeps the surface temperature from plateauing the way it would in still air, which explains why food cooks up to 30% faster than in a conventional oven.
If you’ve ever set up an air fryer under kitchen cabinetry, you’ll quickly notice the exhaust vent needs clearance. That’s the same fan pushing moisture-laden air out the back after it’s done its job. The whole system’s effectiveness depends on unobstructed intake and exhaust, something many users overlook until the appliance trips a thermal cutoff.
Why Cyclonic Airflow Cooks Differently from a Regular Oven
Calling an air fryer a “mini convection oven” is technically true but misses the point. A standard convection oven uses a fan to circulate hot air, sure, but the airflow is relatively gentle and the cavity is huge compared to the food. An air fryer creates what Philips originally termed “rapid air technology,” essentially cyclonic flow.
Air doesn’t just drift around a large box; it’s forced through a compact cylinder or rectangular chamber, accelerating as it hits the curved walls and funneling back up to the intake.
This cyclonic pattern eliminates the dead zones where hot air would otherwise stagnate. In a conventional oven, you often rotate trays halfway through because the temperature varies by 20°F or more from front to back. In a basket-style air fryer, the round shape and top-down airflow create a surprisingly even cooking environment, provided you don’t pile food too deep.
Manufacturer specs show temperature variation inside the cooking zone stays within ±5°F of the set point after the first two minutes, which is remarkable for a countertop appliance.
The speed of the air matters as much as the temperature. Fast-moving air breaks through the thin layer of cooler, moisture-saturated air that clings to food as it cooks. That’s why your potato wedges keep crisping instead of steaming.
In a regular oven, even with convection on, that boundary layer hangs around longer because the airspeed is lower and the cavity is roomier. The fact that the air fryer’s chamber is so tight means there’s nowhere for moisture to hide. It gets ejected through the vent, taking surface water with it and leaving behind a dry, browning-ready surface much quicker.
Our guide section covers how different food types respond to this dynamic, but the core principle always holds: speed plus small space equals intense moisture stripping.
Inside the Basket: Holes, Spacing, and Food Position
If you want to understand how an air fryer cooks food, you have to look at the basket floor. Those perforations aren’t decorative. They’re the return path for the cyclone.
Air blasts down from the top, hits the food, and then curves around to flow back up through the sides or, in better-designed models, through the bottom mesh. That bottom-up airflow is what crisps the underside of your food, and it only works if the holes aren’t blocked by overlapping items.
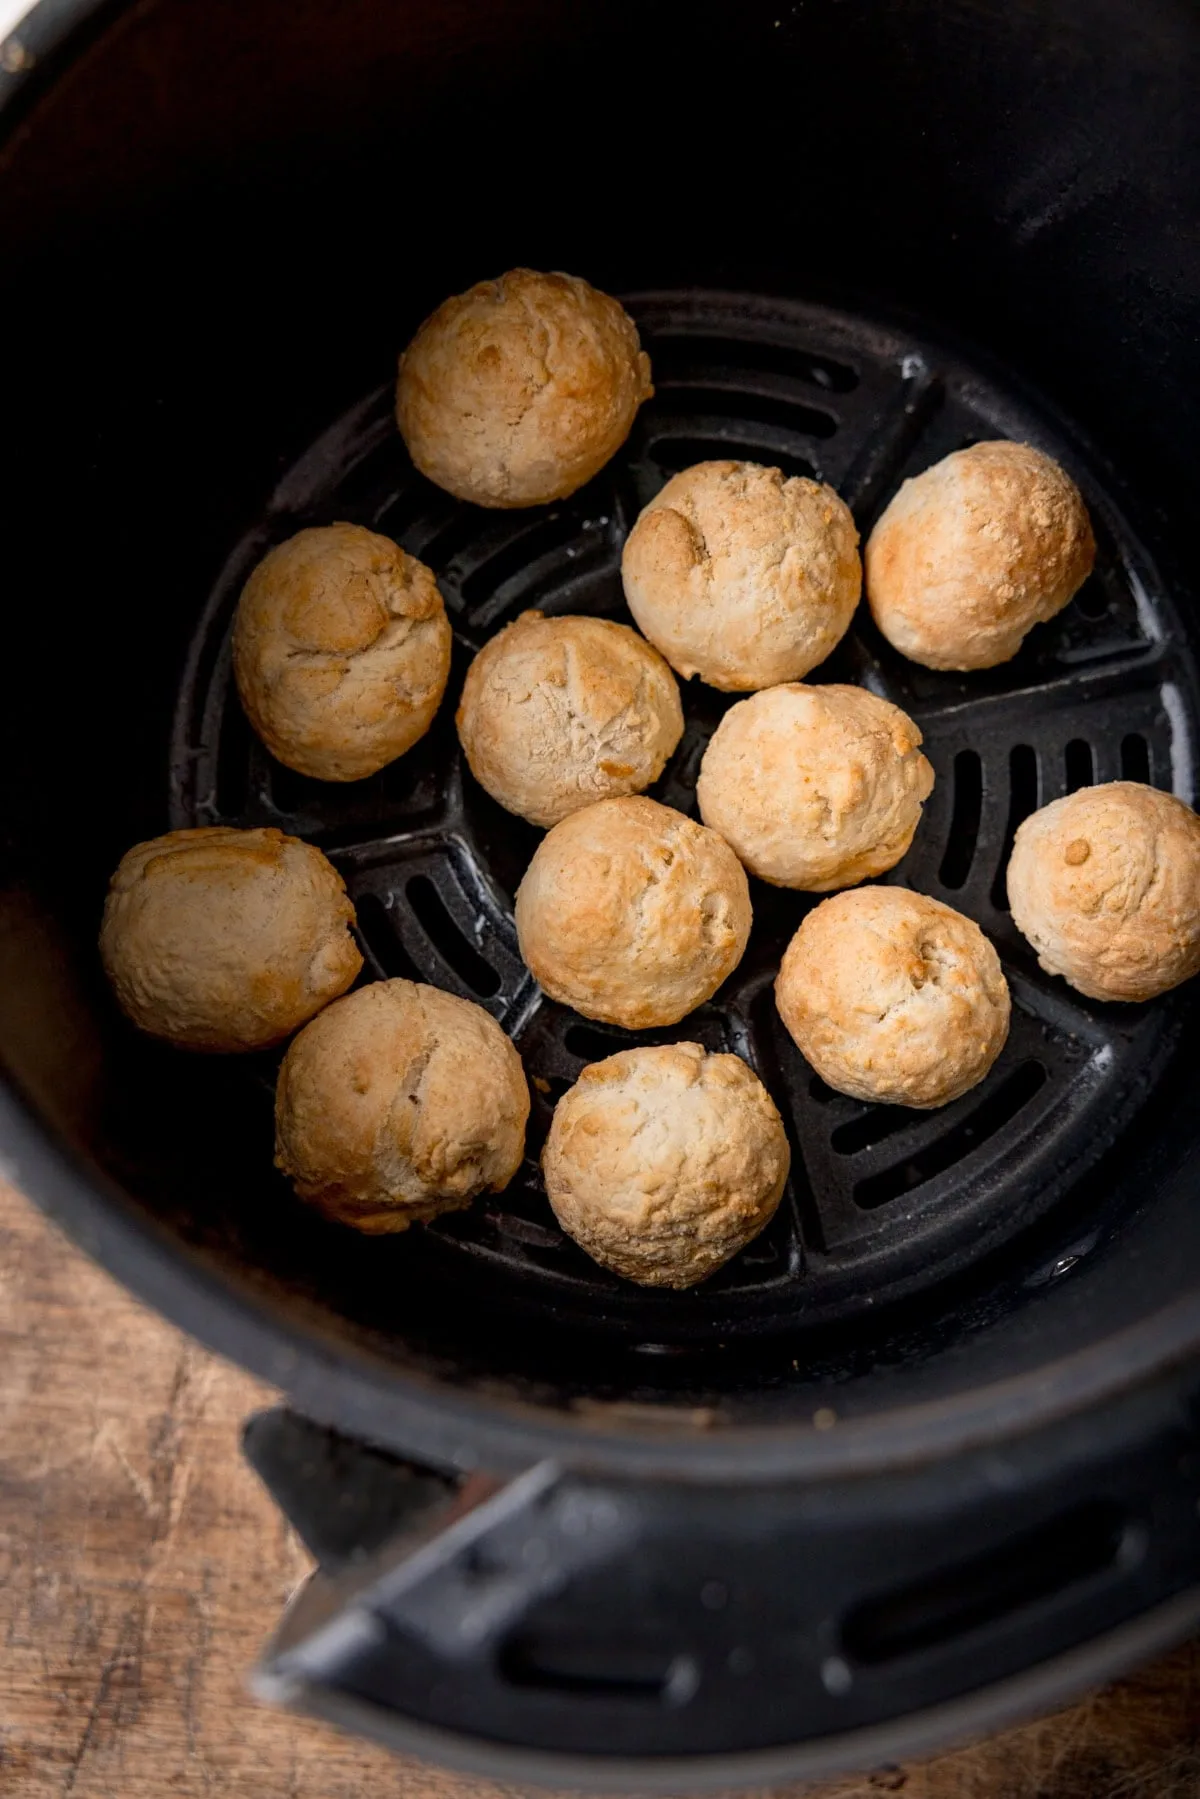
Single-layer loading is the single most repeated piece of advice in user manuals and aggregate reviews. This isn’t about being fussy. It’s physics.
When food pieces touch, they create a wet, airless seam where no browning happens. You end up with pale spots that taste steamed, not crisped. Our research into thousands of user reports reveals that the “crowded basket” mistake is behind most disappointing results, far more often than wrong temperature or time settings.
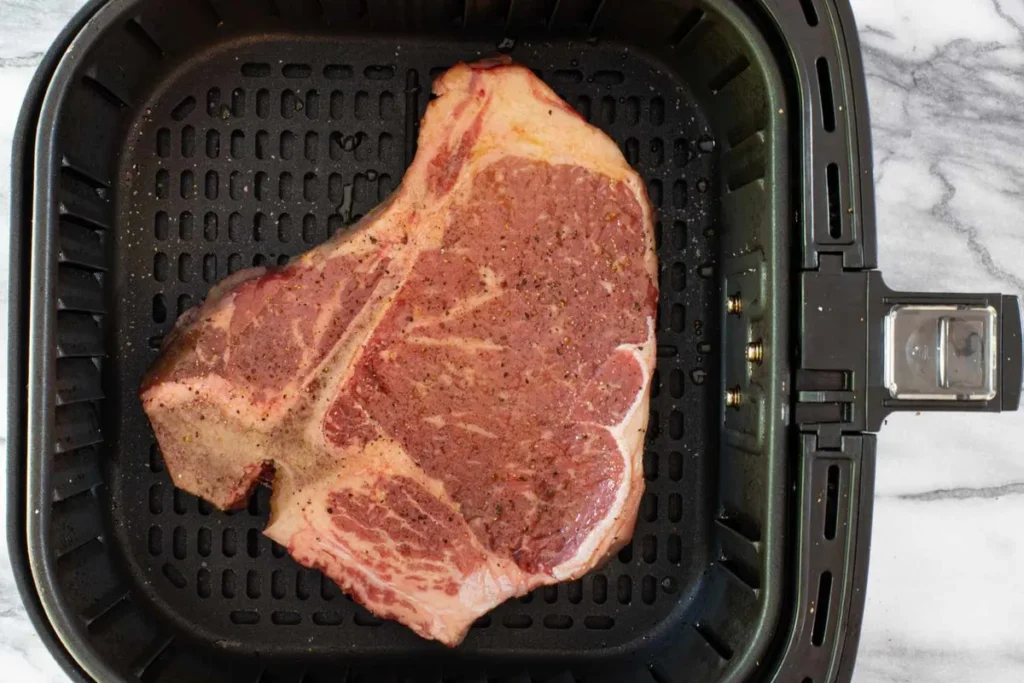
Food position relative to the heating element also matters more than people think. Items placed closer to the top of the basket, like a thicker chicken breast that sits higher, brown faster on top because they’re nearer the radiant heat source. This is why many recipes tell you to arrange thicker pieces toward the outer edges of a round basket, where the cyclonic air tends to concentrate.
Basket-style air fryers often include a crisper plate or a raised rack that promotes even more bottom airflow. If you’re using perforated liners, you need to check that they don’t block those critical lower air channels or your cook time will jump.
Shaking or flipping halfway through the cycle isn’t just for even browning. It redistributes the food so that pieces that were in the center, where airspeed may be slightly lower in square basket designs, get a turn at the hotter perimeter zones. The visual cue is unmistakable: pieces at the edges develop a darker, drier crust faster than those in the middle.
A quick basket shake at the 6- or 7-minute mark evens all of that out.
How Browning Happens Without a Deep-Fry Bath
Browning in an air fryer is a two-stage trick, and the first stage is dehydration. Before any significant color change happens, the fast-moving hot air strips the food’s surface moisture faster than almost any other home cooking method. That dry surface is essential because the Maillard reaction, the chain of chemical reactions between amino acids and reducing sugars that creates that complex brown crust, requires temperatures above 300°F and a relatively low water activity.
In wet cooking environments, you can’t get past the boiling point of water, which caps surface temperature at 212°F. An air fryer blows right past that threshold.
The second stage is where that tiny coat of oil earns its keep. Oil conducts heat into the microscopic crevices of the food surface far more efficiently than air alone. According to research on food browning from the American Chemical Society, a thin film of oil on the food’s surface acts as a heat-transfer medium, allowing the Maillard reaction to progress evenly even in the absence of immersion.
That’s why a tablespoon of oil tossed with a batch of fries delivers a uniform golden color, while completely dry fries tend to brown unevenly and taste leathery.
What you’re not getting is the deep-fried effect of oil penetrating into the food, which is why air-fried foods, especially breaded ones, have a noticeably different mouthfeel. The crust is thinner, crunchier, less greasy. The interior steams in its own moisture because the dry outer layer seals it in, much like a jacket potato in a dry oven.
That’s the key insight: an air fryer doesn’t replicate frying. It creates a parallel set of reactions that produce a visually similar, yet texturally distinct result. And for many people, especially those looking to cut back on oil, that result is even better than the deep-fried version because the food’s own flavor isn’t diluted by absorbed fat.
If you’re curious about how these browning dynamics play out across different recipes, our regularly updated blog covers specific techniques for everything from roasted vegetables to frozen snacks, always with an eye toward what the surface should look like at each stage.
Why That Tiny Coat of Oil Changes the Browning Game
You’ve already seen that the air fryer doesn’t need a pool of oil to brown food. But why add any oil at all? The answer sits at the surface, literally.
A thin oil film bridges the microscopic gaps between hot air and the rough texture of food. Air is a poor heat conductor. Oil is much better.
Even half a tablespoon tossed through a bowl of broccoli florets dramatically increases the rate of surface browning.
That film also prevents surface drying that goes too far. With no oil at all, starchy foods like potato wedges can turn leathery and pale before the interior cooks. The oil traces fry into the surface nooks, creating hundreds of tiny crunchy points.
Visually, you’ll notice an oily sheen that turns matte and blistered as the cook progresses. That’s exactly what you want.
Then there’s adhesion. Seasonings stick to oil, not to dry food. A quick mist of oil locks salt, pepper, and paprika to the surface so they don’t fall through the basket holes.
This small step is often the difference between a richly flavored crust and one that tastes dusty and under-seasoned.
The Visual Step-by-Step: A Typical 12-Minute Cook Cycle
The First 60 Seconds
The heating element glows orange immediately. You won’t see much change in the food yet. The fan roar kicks in, and a thin plume of steam exits the rear vent as cold surface moisture flashes off.
If you preheated, the food’s surface hits above 300°F within the first minute.
The 3–5 Minute Mark
The surface is now visibly dry. Starches begin to look matte instead of damp. Proteins on chicken skin start tightening.
The first hint of golden color appears at the edges closest to the heating element. A faint toasted aroma rises from the vent. If you’re cooking chicken, per USDA guidelines the exterior is drying while the interior temperature slowly climbs toward the safe minimum of 165°F.
The Midpoint Shake or Flip
Around minute six or seven, the food needs a shake. You’ll notice the pieces on the outer edge are darker than those in the center. After shaking, the color evens out.
This is also the moment to check if anything looks dry. A quick spritz of oil at this stage can rescue a batch that’s browning too fast in spots.
The Final Browning Window
The last two or three minutes are where deep browning accelerates. The food’s surface moisture is nearly gone, so the Maillard reaction fires at full speed. Watch closely now.
A thirty-second overshoot can push golden to burnt, especially for sugary marinades or thin breaded coatings. The visual goal is a uniform deep amber hue with tiny blistered pockets where oil pooled and fried.
What You See, Hear, and Smell at Each Stage of Cooking
Your ears give you the first cue. A steady, loud fan whoosh means airflow is unobstructed. A sudden change in pitch can signal that a lightweight leaf of kale has flown up and stuck to the heating element.
That’s a smell you’ll learn fast: acrid, papery, almost like burning toast.
Steam volume tells you how much moisture is still inside the food. Heavy steam in the first few minutes is normal. If thick steam is still pouring out past the eight-minute mark, the basket is likely overcrowded.
The food is stewing, not crisping. When steam tapers to a faint wisp, you’re in the browning zone.
The aroma shifts from wet and vegetal to roasted and nutty as the cook progresses. Trust your nose. That deep, savory scent means the Maillard reaction is peaking.
If you catch a sharp, charred note, pop the basket open and check immediately.
Common Visual Failures and What They Tell You
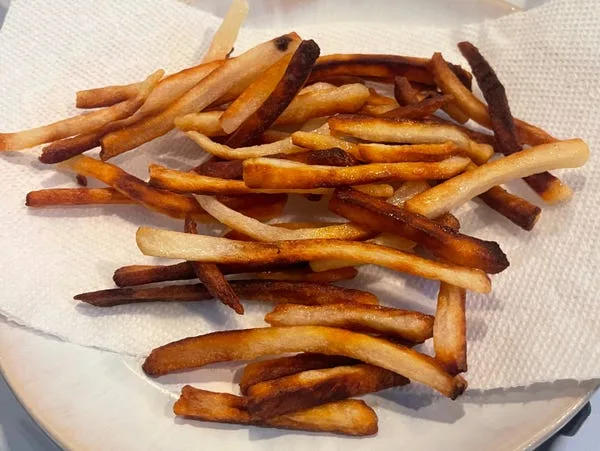
Pale, Dry Patches
You see sections of food that are leathery and beige instead of crisp and golden. That’s a contact point where two pieces overlapped. No air reached the surface, so it steamed.
The fix is always the same: fewer pieces in the basket and a proper shake halfway through.
Burnt Edges with Raw Centers
The outer rim of a chicken thigh is blackened while the center is still pink and cool. This happens when the temperature is too high and the food is too thick. The radiant element scorches the outside before heat can conduct inward.
Drop the temperature by 25°F and add time. Thick proteins also benefit from a rest period outside the basket.
Food Stuck to the Basket
You pull the basket and half the breading is left behind on the mesh. This is almost always a preheating issue. Cold food hitting a cold basket creates a bond.
Preheating the empty basket for two minutes and lightly oiling the mesh prevents most sticking. Parchment liners help but must be perforated so airflow continues underneath.
Lightweight Foods Flying Around
Kale chips or small herb leaves lift off and hit the heating element. You’ll smell it instantly. The solution is to use a trivet or a wire rack placed on top of the food to pin it down without blocking airflow.
Some air fryer models include a lightweight guard for exactly this purpose.
Basket-Style vs. Tray-Style Air Fryers: Where the Air Actually Goes
Basket-style air fryers pull air from above, blast it downward through a round perforated basket, and recirculate it around the curved walls. They’re excellent at creating a focused cyclone for small batches. The downside is that all food sits in one level, so capacity is limited to what fits in a single layer.
Tray-style air fryers, often called air fryer ovens, use a rectangular cavity with multiple rack positions. Air still comes from a top-mounted fan and element, but the flow is flatter and less cyclonic. Food on the middle rack cooks more slowly than food on the top rack.
Many recipes require tray rotation for even results. The advantage is you can cook more food at once, and the front window makes visual monitoring easier without pulling the tray.
Neither design is inherently better. Basket models win on sheer airspeed and crispness for small portions. Tray ovens win when you’re cooking for a larger household and want to watch the browning through glass.
As of 2026, the line between the two is blurring as some tray models now incorporate additional side fans to mimic true cyclonic flow.
How Food Thickness and Water Content Change the Visual Result
Thick cuts stall browning. A dense chicken breast steams internally while its surface is still pale and wet. Thin potato slices crisp fast and evenly.
High-water vegetables like zucchini release so much steam they can look waterlogged instead of roasted. For these, a higher temperature and a parchment sling help, but don’t expect deep fryer-level crunch. Your eyes tell the truth: limp and pale means moisture won, not heat.
Cleaning and Airflow: Why a Greasy Basket Changes Cooking
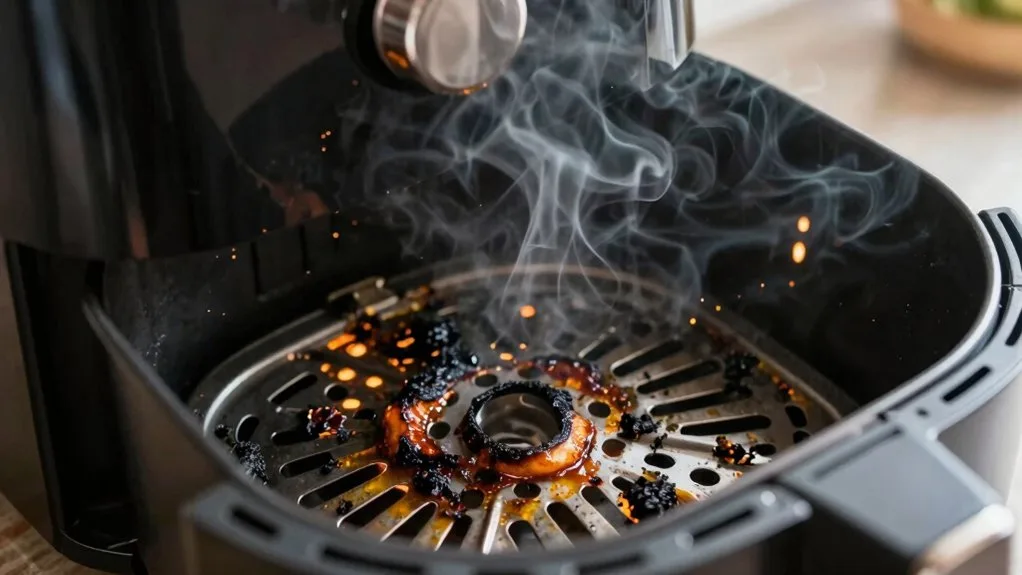
Grease buildup plugs the perforations that make cyclonic air work. Blocked bottom holes mean no updraft, so the underside of your food steams against its own drippings. Smoke point drops, too.
Residue from bacon or chicken fat will smolder at much lower temperatures than fresh oil. A quick wipe with warm, soapy water after every batch keeps the airflow fast and the food crisp. Manufacturer specs often note that heavy carbonized grease can trip the thermal fuse, shutting the unit down entirely.
Safety Visuals: Smoke, Sparks, and When to Stop Cooking
A faint white puff of steam is normal. Thick, blue-tinted smoke means oil residue has hit its smoke point. Unplug immediately and let the chamber cool.
Sparks are rare and usually trace back to a loose crumb touching the element. If you see a persistent orange flicker, stop the cycle and inspect. Per USDA safe temperature guidelines, always verify meat doneness with a probe thermometer, not just by sight.
Never run the appliance empty except during a brief preheat.
The Air Fryer Visual Cheat Sheet: Doneness and Texture Cues
For fries and wedges: uniform deep gold, matte surface, no wet patches. Chicken skin: mahogany, tight, and blistered with rendered fat bubbles. Salmon: opaque pink with a thin translucent center line that disappears as it rests.
Breaded items: an even toasted-crumble look with zero powdery white spots. Vegetables: lightly charred edges, still bright inside. If it looks wet or dull, give it two more minutes and check again.
Timing varies, but these visual benchmarks hold across models.
Frequently Asked Questions
Does an air fryer actually fry food?
No. It doesn’t submerge food in hot oil. It dehydrates and browns the surface with high-speed hot air plus a trace of oil.
The result mimics fried texture.
Can you cook without any oil at all?
Yes, but the crust will be drier and less evenly colored. A light mist of oil bridges heat into surface crevices and anchors seasonings.
Why does my air fryer smoke so much?
High-fat foods drip grease onto the bottom pan. That residue smokes when the element cycles on. Clean the pan after every cook and avoid low-smoke-point oils like extra virgin olive oil.
Do I always need to preheat?
Not strictly, but preheating for two minutes improves browning and reduces sticking. Cold food on a cold basket often bonds, tearing off the crust.
Why is my food not crispy in the air fryer?
Overcrowding is the top reason. Piled food blocks airflow and steams itself. Cook in a single layer with space between pieces and shake halfway.
How is an air fryer different from a convection oven?
The air fryer’s fan speed, compact chamber, and close heating element create a more intense cyclone. Food crisps faster and moisture strips away quicker than in a standard convection oven. For more recipe comparisons and technique deep-dives, check our growing collection of air fryer guides.